Deep Clean Your House Room by Room

Your home is where the heart is — and as the setting for your family dinners, lazy Sunday mornings, busy weeknights and special moments spent together, your heart is your house. While renting or owning a house brings its own brand of joy, it also comes with a bundle of responsibilities — from balancing the bills and money management to more physical home needs like maintenance, repair and, most importantly, cleaning. When you’re busy packing lunches, cooking dinners and keeping up with the kids’ schedules while juggling your work life every day, sometimes those little cleaning and upkeep tasks can slip through the cracks and start to pile up, leaving you with a less-than-clean abode by the time you catch your breath and have time to look around.

Even when you do your best to clean up, spot clean and stay on top of regular house cleaning tasks, a house is a big place that sees a lot of activity. It’s only natural for it to accumulate layers of dust and dirt, streaks and stains over time — that’s why every home needs a deep cleaning now and then. Also known as the classic household “spring cleaning,” a deep cleaning means an in-depth, thorough cleaning of the entire house that covers every room and can include areas like windows, walls, floors, furniture and surfaces. If you’re thinking of deep cleaning your house, you’re not alone — while 74 percent of Americans perform “light cleanings” regularly, 91 percent of the population participates in spring cleaning, with 76 percent repeating the process each year.

As the place where you live with your family and share so much love, your house deserves a little love, too, and thorough cleaning is just the right way to refresh both your surroundings and yourself. But how do you deep clean a house? Where should you begin, what should you cover and how long will it take? If you’re looking for tips for a home deep cleaning, we’re here to help. From deep cleaning house hacks to how to clean every room of the home, here’s your deep cleaning house checklist.

When Cleaning a House, Where Do You Start?

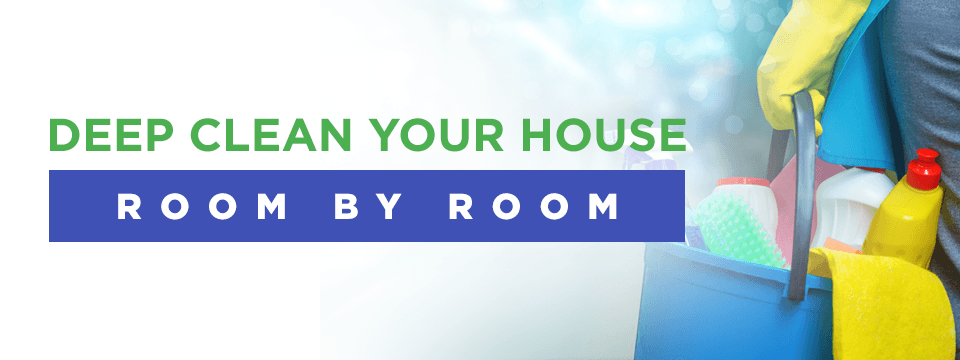
When you begin cleaning your house room by room, you might feel overwhelmed by the amount of space you need to scour and unsure of where to begin. Should you start with the upstairs or the downstairs? What parts of each room will you need to focus on? How long will it take to thoroughly clean your house top to bottom? When you’re taking on a cleaning project of this scale, it can be easy to overthink and feel like you’re out of your depth, but don’t worry — it’s not as hard or as much work as it seems when you break up your cleaning into different areas and different days. One of the best house cleaning secrets is scheduling — to keep your sanity intact, keep you from overworking yourself and make sure you’re doing the most thorough job in every room, it’s important to break up your rooms and tasks into a specific cleaning schedule separated into days or weeks.

Before you begin cleaning, make a plan for when you’ll be cleaning each area and what to do in the time allotted for each specific room. You might want to get your deep cleaning done as quickly as possible, but breaking up your tasks into manageable chunks will ensure you have the right amount of energy and attention for each room and give you the motivation to keep going without burning out. You’ll be checking off areas and spacing out the work according to your schedule.

If you’re hoping to knock out your home cleaning in a week, don’t just roll up your sleeves and try to get as far as you can the day you begin. Instead, assign one room for each day of the week, make a list of the specific tasks you need to tackle in each room and focus only on the current day’s cleaning when each day comes. Even if you can’t spend the entire day cleaning, set aside a little time in the evenings, or when you have a break — remember, you’re going at your pace, and every little bit counts. If you don’t have a ton of time to devote to cleaning and you can’t work on your house every weekday, that’s OK, too — schedule your chores on the weekends, maybe at a pace of one room per day. Whether your deep cleaning takes a week or a month, it will comfort you and keep you moving forward when you have the security of a cleaning schedule to pace yourself with.

Before You Begin

Before you dive into your deep cleaning, you need to make sure you’ve prepared yourself for the job — which means you’re not only mentally equipped with your cleaning game plan, but physically ready to get down and dirty. Rolling up your sleeves and delving into the nitty-gritty cleaning of each room won’t be possible if you’re working around a ton of clutter on your dressers, floors and countertops, so you need to start your deep clean with an initial declutter. Go around your house, working through each room carefully, and pick up any toys, books, paper piles and pet toys. Organize your desks, dressers and countertops, and put away loose items in drawers or cabinets. Make sure your floors, surfaces and windowsills are clear to make room for a thorough scouring and make your job easier when it’s time to vacuum, dust and scrub.

Not only will decluttering before you clean help you clean your house quickly and properly, but it will make you feel more organized and more confident in your living space and your cleaning efforts. A clean home is a clean mind, after all, and once you’ve made everything neat and tidy, you’ll want it to be spic, span and squeaky-clean to match.

New or Old Home Full Cleaning: What You’ll Need

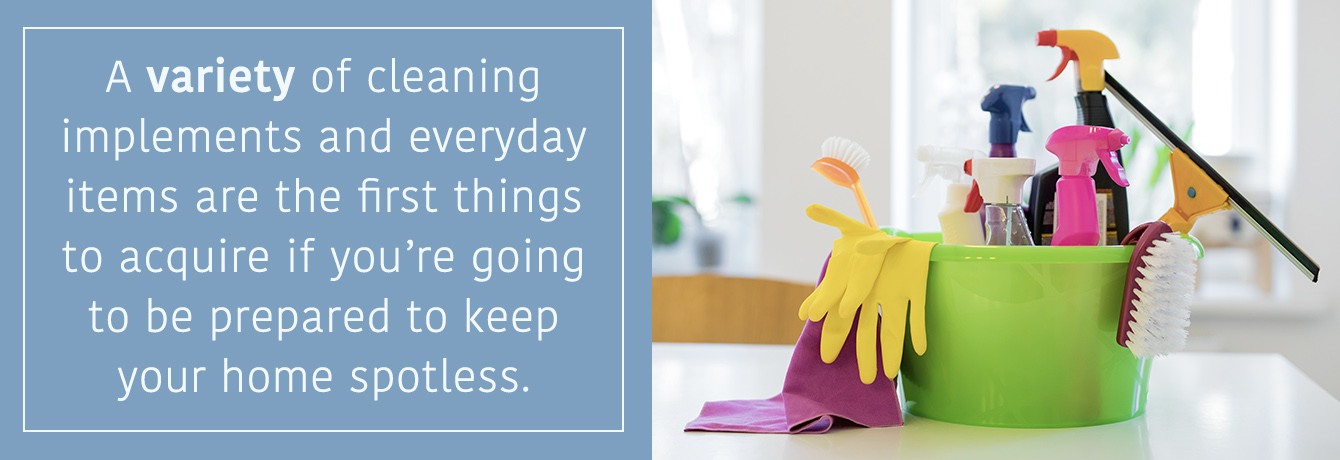
Whether your home is well-worn or relatively new, any house can use a good cleaning at least once a year. Because you want to get right down to it when it comes time to clean and not lose your flow in the middle if you end up needing materials you don’t have, it’s a good idea to make sure you’re stocked up on deep home cleaning supplies before you begin. Don’t worry about the deep cleaning house cost — you’re likely to have most of the materials you’ll need around the house already, and if not, they’re simple, affordable and only a trip to the grocery store away. Here’s your house cleaning materials checklist:

  • Baking soda — When it comes to scrubbing those hard-to-tackle stains on fabric or floors and getting off that caked-in grime from your surfaces, baking soda does the trick beautifully. You probably already have this in your pantry, and when you combine it with vinegar, you won’t need to invest in a bunch of pricey cleaners — that’s one of our favorite deep cleaning house hacks.
  • Bleach — When you’re cleaning your bathrooms or kitchen, you might want to make sure your sinks and bathtub are spotless and free of any accumulated bacteria, so it’s always a good idea to have powdered bleach on hand.
  • Broom — We know, you have a vacuum cleaner — but this is a thorough cleaning, and to make sure you get every speck of dust in every corner and hard-to-reach space, you’ll need a broom, too. Use it to reach into corners, under tables, behind appliances and even to sweep out cobwebs or dust from ceiling corners. You don’t need anything especially fancy — just something to sweep!
  • Cleaning caddy — When you’re carrying your cleaning materials from room to room to scour your house from bottom to top, it might become a little bothersome to lug each item up and down the stairs or to different areas of the house, one by one. That’s why it’s always a good idea to carry a cleaning caddy or a portable container you can use to store and transport all your cleaning essentials. You can purchase a cleaning caddy at the store, or use a basket or large Tupperware container — whatever works! Keep in mind, a handle is handy for something you’ll be using to transport materials.
  • Dish soap — It might sound simplistic, but scrubbing your countertops and other non-wooden surfaces can be as easy as diving in with some dish soap! Your regular brand should work just fine.
  • Duster — Breathing in the clean, fresh scent of your squeaky-clean home is one of the best parts of a deep house cleaning, so make sure you remember your duster. It will help you eliminate every speck of dust from walls, ceilings, corners, baseboards and wherever else it hides.
  • Lint roller — Your furniture and fabrics can collect dust, lint and hair just like your clothing — even when you vacuum it regularly. Keep a few lint rollers on hand for making sure your couches and curtains are as clean as possible.
  • Mineral oil — Natural, fresh-smelling and environmentally friendly, mineral oil can serve a variety of uses when cleaning — including toilet bowl cleaner, wood treatment, furniture polish and air freshening. If you’re looking for a versatile cleaning material you don’t need too much of, mineral oil can go a long way — and save you from having to buy various area-specific cleaners. You can also just rub a little on your surfaces and wipe them down after you’ve cleaned them to give your space a clean, fresh smell.
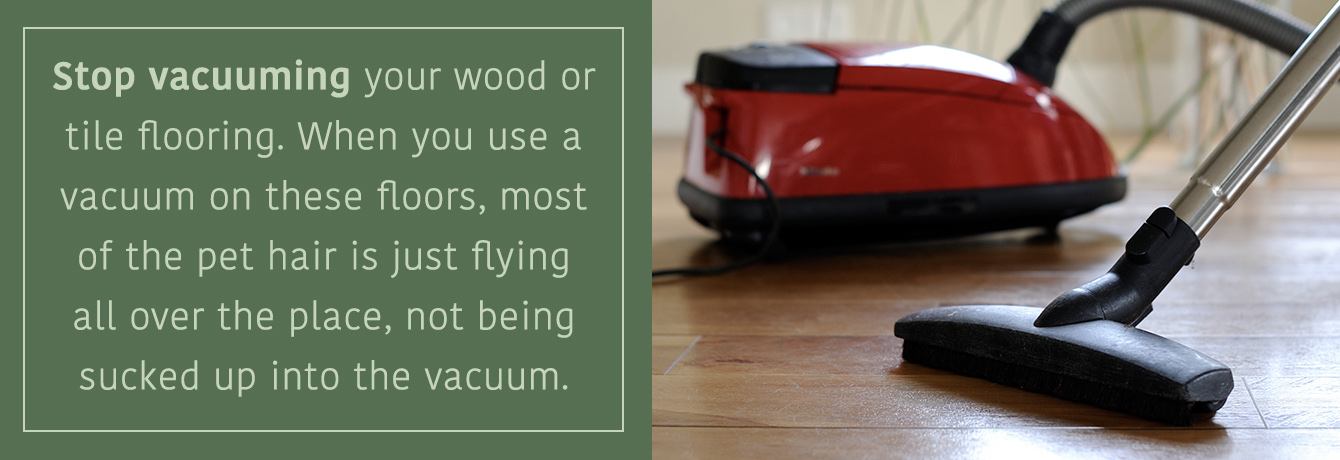
  • Mop — You want those hard floors to shine more than they do when you vacuum — plus, you want to erase all the caked-on dirt and grime that’s accumulated during the year. Mopping may sound old-fashioned, but it’s the best way to keep your laminate, tile and other hard floor surfaces clean, so make sure you make a mopping plan.
  • Multi-purpose cleaner — You’re cleaning every room in the house — that’s a job that calls for multi-purpose cleaner. Having this on hand will cover you for any area of your home.
  • Plastic gloves — When you’re using bleach or other strong cleaning materials, you’ll need plastic gloves to protect your hands and keep them from drying out.
  • Paper towels or rags — When you’re wiping down your surfaces and furniture, you’ll need materials like paper towels or reusable rags to help you with the job.
  • Sponges — Sponges are a reusable, helpful tool for cleaning your bathrooms and kitchen.
  • Stiff-bristled brush — A handheld brush with stiff bristles will help you scrub those caked-on counters and surfaces with ease to get everything squeaky-clean.
  • Vacuum cleaner with extensions — You want all your floors to be free of dust, debris, hair and whatever else accumulates, so make sure you have a high-quality vacuum cleaner with extension accessories to cover hard-to-reach areas.
  • Vinegar — Mix this with your baking soda, and you’ll have a powerful cleaning solution for almost any surface. White vinegar works best.
  • Window and glass cleaner — When you’re doing your deep house cleaning, don’t forget your windows and mirrors! Invest in a modest bottle of Windex or another glass cleaner.
  • Wood cleaner — Deep cleaning isn’t just dusting and vacuuming — to keep your wooden furniture and surfaces shiny and well-treated, make sure you have some wood cleaner to nourish your wood. You can even choose a product with a rich scent like orange to keep your rooms smelling fresh long after you treat your wood furniture.

Kitchen Cleaning Tips and Methods

When you’re all stocked up and ready to begin your deep clean, your kitchen is always a good place to start. As one of the central areas of the home, it not only sees a lot of traffic but gets a lot of use — and is probably the most in need of a good scouring. Plus, when your kitchen is well-cleaned, it will give you the motivation to continue with easier areas. Here’s a checklist of cleaning hacks for your kitchen:

  • Clear your counters and scrub them down — Remove all your decor, countertop appliances and kitchen items from your countertops, spray them with cleaner and wipe them down. This step removes all crumbs, dust and grime and sanitizes your surfaces.
  • Wipe down cabinets — Use your wood cleaner or all-purpose cleaner to wipe down, clean and treat your wood cabinets or cabinets of another material.
  • Vacuum the floors and refrigerator coils — Vacuum your entire kitchen floor, making sure to get behind and beneath appliances like the fridge and oven, under tables and in corners. Use your extension accessories to vacuum the refrigerator coils, as well.
  • Mop the floors — After you’ve vacuumed, mop your floors with the appropriate solution to get them clean and shining.
  • Clean your fridge and freezer — Remove your groceries from your refrigerator and freezer, clean out the insides with a non-toxic cleaner and re-organize your food for a fresher fridge and mind.
  • Scrub your stove and clean your oven — Most ovens have a self-cleaning setting, which you should run before wiping it out. Scrub down and sanitize your stove range, as well.
  • Clean out the microwave — Take out the spinning plate and wipe down the microwave with a non-toxic cleaner.
  • Disinfect your sink — Remove any dishes or sponges from your sink, spray with disinfectant and wipe down, then rinse with water.
  • Organize your pantry and cabinets — Go through your cabinets and pantry, organizing your food and dishes. You’ll know where to find everything and feel refreshed by your new organized system.
  • Toss old sponges and washcloths — Nothing builds up bacteria like the wet sponges and washcloths you use to clean your dishes and counter, so make sure to throw away any you’ve had for a while and replace them with fresh, new sponges or cloths instead.
  • Wipe down windows — Use your glass cleaner to wipe down the insides and outsides of your windows.

Living Room Cleaning Tips and Methods

As the area where your family likely spends the most time watching TV and relaxing, your living room is another favorite common area that will be in need of a thorough dust-up. Here’s your checklist for scouring your living room or family room:

  • Remove couch and chair cushions and vacuum beneath them — Strip your couches and chairs of their pillows and cushions and vacuum thoroughly inside the couches with your extension accessories, making sure to get in the crevices.
  • Move furniture, vacuum and shampoo carpets — Vacuum your floors, being sure to move your couches and furniture to uncover the areas underneath them, and shampoo the entire carpet when you’ve finished.
  • Dust furniture and decor — With your duster, thoroughly clean your furniture and decor to remove dust and dirt buildup.
  • Polish your wooden furniture — Use your wood cleaner to treat and polish your wooden furniture until it shines.
  • Wipe down baseboards, light fixtures and fans — Don’t forget the little things! Use a duster or broom to remove cobwebs and dust from corners, baseboards and high places, then wipe down your baseboards and light fixtures with a clean cloth.
  • Clean electronics — If your television or music systems are looking dusty or streaky, gently wipe them down with an electronics wipe to give the room an even fresher feel.
  • Wipe down windows — Finish off your living room deep cleaning by wiping down the windows with your glass cleaner. Sparkling!

Dining Room Cleaning Tips and Methods

Even if you only use it for special occasions like Thanksgiving or extended family dinners, your dining room should be clean and fresh to serve as a suitable setting for enjoying a good meal. Here’s what you need to do to clean your dining room thoroughly:

  • Dust walls, ceiling, baseboards and furniture — First, use your duster to remove the dust buildup from your walls, baseboards, tabletop, furniture and any light fixtures in the room.
  • Wipe down or treat furniture and table — After you’ve dusted, wipe down your tables and furniture with the appropriate kind of cleaner — whether that’s wood cleaner or multi-surface cleaner for other materials.
  • Organize hutches and clean dishes — If you have a hutch to keep your fine china or dishes for special occasions, now is the time to freshen it. Gently remove your dishes and wash them by hand, dust your shelves and wipe down the inside of the hutch, then replace its contents.
  • Wipe down windows — Use your glass cleaner to make your windows shine inside and out.
  • Vacuum or mop floors — Vacuum carpets or mop your floors if they’re a hard surface.

Bedroom Cleaning Tips and Methods

You spend every night and a good portion of your day in your bedroom — whether you’re sleeping, changing or catching some relaxation time — so you want to make sure you’re breathing clean, dust-free air and keeping your environment tidy. Here’s your bedroom cleaning checklist:

  • Wash the bedding, sheets and curtains — Start by stripping your bed of its sheets, covers, pillowcases and mattress covers and throwing everything in the wash to freshen it up. If you have curtains in your bedroom, wash those, too.
  • Flip your mattress — To freshen your mattress and keep your bed from settling too much to your body’s indent, flip your mattress over while you have your bed stripped and pat it down a bit.
  • Dust windowsills, furniture, walls and ceiling fixtures — Using your duster, wipe off your furniture surfaces, walls, baseboards, windowsills and ceiling fixtures to get rid of the extra dust that’s been sitting in your room.
  • Vacuum or mop floors — Thoroughly vacuum your floors — including the space beneath your bed and behind your furniture — and follow up with a mopping if your bedroom has hard floors.
  • Wipe down drawer interiors and shelves — Dust and wipe down your shelves, and — if you’re feeling extra thorough — remove the contents of your dressers and desks to dust and clean their drawers, as well.
  • Clean out and organize closets and drawers — Go through your closet, your dressers and any other possessions in your room, tossing or giving away what you no longer use and organizing the contents you keep. Believe us, it’s liberating.
  • Treat wooden furniture — Use your wood cleaner to polish any wooden furniture, including your bed frame and headboard.
  • Wipe down windows — Finish off your bedroom cleaning with a shine by wiping down your windows with your glass cleaner.

Bathroom Cleaning Tips and Methods

As the places that probably get the most use in your house, your bathrooms need a spot cleaning at least once a month — but when you dive in for a deep clean, here are some bathroom cleaning hacks for a sparkling fresh space:

  • Scrub down sinks, showers and bathtubs — Using your bleach, bathroom cleaner or multi-purpose cleaner, scour your sinks, tubs and shower area to remove all traces of mold or dirt accumulation with a scrub brush or cloth.
  • Clean and disinfect toilet — Use your toilet cleaner, bleach or multipurpose cleaner to scrub and sanitize your toilet bowl inside and out. Be sure to wipe down the floor around the toilet when you’ve finished to prevent moisture buildup.
  • Wipe down counters, mirrors and windows — Remove everything from your countertops and scrub them down using a grout mixture of baking soda and vinegar. Your stiff-bristled brush will help you get out all the grime. Wipe away residual cleaner with a paper towel or cloth and sanitize with multi-purpose cleaner. Next, use your glass cleaner to wipe down your mirrors and windows. If you have a glass shower door, scrub it down with bleach, then polish it with glass cleaner.
  • Dust and wipe down walls and light fixtures — Use your duster to clean your walls, baseboards, corners and light fixtures.
  • Clean and organize cabinets — Organize the contents of your bathroom cabinets, then wipe down the outsides with wood cleaner or a multi-purpose cleaner for non-wood materials.
  • Wash shower curtains, towels and bathroom rugs — Strip your bathroom of its curtains, shower curtains, towels, hand towels and rugs. Toss them all in the washer and replace when clean.
  • Disinfect doorknobs and handles — Use your multi-purpose cleaner or a sanitizer to disinfect doorknobs, cabinet handles, sink handles and toilet handles, which get a lot of use.
  • Vacuum and treat bathroom floor — Thoroughly vacuum your bathroom floor and mop to remove dirt buildup. If your floor is hardwood, use a wood cleaner to polish and treat it.

Basement Cleaning Tips and Methods

You might not be thinking of your basement when you dive in for a deep house cleaning, but it’s an area that can get especially dirty — so it’s important to scour it every year or so. If you don’t have a basement, this advice will apply equally well to your laundry room. Here are some good housekeeping tips:

  • Vacuum floors — Dust and lint are especially sure to accumulate where you do your laundry, and bugs might find their way in as well, so perform a thorough vacuuming of your floors.
  • Dust corners, ceilings and light fixtures — Clear out the cobwebs and dust from your corners, light fixtures and ceiling area with your duster and broom.
  • Wipe down and sanitize laundry machines — Use your multi-purpose cleaner to wipe down your washer and dryer until they shine.
  • Clean out dryer sheets and vents — This step is something you should regularly do to avoid fire hazards, but be sure to clear out lint and dryer sheets from your dryer and make sure your dryer vents are clear.
  • Throw away old supplies and organize — If you have old detergent bottles or dryer sheets sitting around, toss them in the trash and try to organize whatever supplies or storage you keep in your basement.

Cleaning Doesn’t Stop: Upkeep Services

When you’ve finished your deep house cleaning, look around your sparkling, spotless home and take a deep breath — doesn’t that feel fresh? Whether it takes a week or a month, you should be proud of the thorough cleaning you’ve performed, and even prouder of your beautiful home. As amazing as a deep house cleaning feels, however, keeping up with your home takes more than a once-a-year scouring. We know how busy life can be — and how spot-cleaning and maintenance can pile up when you’re attending to more important priorities. That’s why we’re here to help.

Offering you personalized, attentive and regular service from caring people who live and work in the Baltimore area just like you, Thai Cleaning Service is a local cleaning company that helps you keep up with all those little cleaning tasks to make sure your house stays in tip-top shape all year. Whether you need help decluttering, keeping up with chores like dishes, trash and laundry, staying on top of regular bathroom cleanings or dusting and vacuuming, our maid service does it all — and we offer you personal, friendly attention you can trust by assigning the same person to handle all your scheduled cleanings. Thai Cleaning Service doesn’t require a contract or commitment — we’re just here to make your life easier and your home cleaner, so you can focus on what’s most important.

We have all the house cleaning secrets you need to feel confident in the state of your home. Contact Thai Cleaning Service today for more information!

What Your House Cleaner Wants You to Know

Hiring a house cleaning service is a luxury more and more people are requesting because of its affordability. Whether you’re too busy to deep clean your home, you’re preparing for an upcoming event or you simply detest cleaning, house cleaners can do it all. However, there are some things you need to know to receive the best service time and time again. Here are some of the biggest things your cleaner wishes you knew when you request a cleaning service.

Prepare Your Home to Be Cleaned

Yes, you’re hiring a cleaner to pick up around your house and make it more presentable. But that doesn’t mean they should be sorting through your mail, picking up your dirty clothes and organizing your shoes in your home’s various rooms. Before your cleaner arrives, give a glance throughout each room. Find the areas you can declutter to make your home more accessible. Besides, when you organize, your cleaner cleans — and when they spend less time in your home, you ultimately save money.

Take Care of Your Pets

Most cleaners don’t care if your dog or cat is hanging around the house while you clean, as long as you check with them first to learn of any possible allergies or fears. However, if you know your dog attacks the vacuum when you try to move it, remember that they’ll probably attack the cleaner’s vacuum too. Think in advance about cleaning day, and prepare to board your pet for the afternoon or keep them locked in a kennel or spare room to keep them out of harm’s way.

Be Specific With Your Directions

Cleaners know how to clean. However, they don’t know what your precise definition of “clean” is. If you want your home to look a particular way after your cleaner leaves, you need to let them know. Request an at-home consultation to give a thorough tour and explanation. Even leaving a list describing which areas need the most attention will guide your cleaner in the right direction.

Also, remember that cleaners are not magicians. They can’t read minds, and they can’t snap their fingers and be done with the task. Allot your cleaner the amount of time they recommend for your requested services. If you want all four bedrooms and three bathrooms deep cleaned, expect to let them work for multiple hours.

Show Your Appreciation

Finally, make sure your cleaner feels appreciated for the work and care they show your home. Monetary tips are always welcomed and highly recommended. However, if you’re running short on extra cash this week, show your cleaner you appreciate their work. For instance, write a thank you note or surprise them with baked goods. In addition, always offer water to drink.

House cleaning services can be the perfect addition to your home and can help you balance your work-life schedule. These tips will provide you with what you should know when hiring a house cleaner. If you’re in the Baltimore area, you can trust Thai Cleaning Services. A locally owned service that is insured as well as licensed and bonded, we’ll quickly become the reliable and trustworthy helping hand you never knew you needed. Reach out to us now for more information.

How to Clean Wood Floors

The process of cleaning wood floors is much smoother than you might think. While hardwood floors may seem like they require more maintenance than carpet or tile, they’re easy to clean — if you have the right information and guidance.

From knowing what to use to clean wood floors to the techniques involved, here are some wood floor cleaning tips.

Trap Dust — Don’t Push

To give your floors a regular presentable appearance, dust and sweep them regularly. Don’t use a standard broom, as it will only push around the dirt and debris. You want to use something that will trap dirt, dust, and other allergens and lift them from the floor. Microfiber mops and cloths use static electricity to capture tiny particles left stranded on your wood floors.

While it’s recommended to do a sweep every day, it all depends on the traffic of your household. With pets roaming around, you may want to give a good sweep daily. Otherwise, you can probably get by keeping your floors looking beautiful by sweeping every two or three days.

Vacuum With Care

The presence of hardwood floors should not deter you from using a vacuum. However, you should be mindful of its key features. Try not to press too forcefully, as the wheels can cause scratching. You also want to replace the beater bar attachment with a floor brush to prevent possible damage.

Mop Your Floors Monthly

The number of times a month you mop your floor can fluctuate but aim for two to three cleanings. You’ll want to use a soft-headed mop that cleanly passes over your flooring and won’t scratch the finished surface. Avoid saturating your floor with liquid, as a buildup of water can contribute to long-term damage. Instead, lightly mop over the wood, or mist the floor with cleaner and gently wipe over it.

Vinegar can be used, but in small amounts — too much vinegar concentration can dull the wood’s finish. Soapy and waxy cleaners can leave behind residue on your floors, so try to avoid applying these products on the surface. You can always find cleaners specifically designed for hardwood floors to mop and spot treat with.

Keep up Your Maintenance

Polishing your floors isn’t as stressful as you’ve probably made it out to be in your mind. In fact, it’s a rather painless process that needs to be done only a few times a year. Polish can fill in the tiny scratches you’ve built up during the past few months as well as keep your protective surface in top shape.

Proper wood floor cleaning wouldn’t be complete with resanding and refinishing. The frequency of this process is variable depending on your wood floor traffic, but you should aim for every four or five years. You’ll thank yourself once you realize how much cleaner your room and house look when the finish of your wood is stripped away and replaced.

Cleaning your wood floors is an easy task to keep up with, but if you find yourself lacking the time, Thai Cleaning Service will do it for you. Request a free estimate today, and we’ll keep your hardwood floors looking brand new.

How to Properly Wash Dishes

No one likes to deal with the messy aftermath of preparing a family meal or baking a dessert for a get-together. If you have a dishwasher, the clean-up stage is made a little easier for you — but without one, you might feel like washing dishes will take hours. Before you strain your back and turn your fingers into prunes, here are a few key dishwashing tips to teach you how to wash dishes efficiently.

Rinse off Dishes Right After Use

Instead of piling stacks of dirty dishes in or beside your sink — many filled with crumbs or with a layer of coffee at the bottom — rinse them out. This step will save you after your meal, later that night or the next morning because you won’t be spending extra time trying to scrub off excess food and liquid.

The Hotter the Water, the Better

Not only should you be using hot water to wash your dishes — bacteria and germs are killed this way — but you should also use hot water to rinse off the suds. It creates fewer streaks and spots on your glassware, making the air-drying process go flawlessly.

Here’s a dishwashing secret — cold water will help you remove dairy and starch products. If you’ve been using bowls and pots to bake, running some cool water over them before submerging and washing will keep you from scrubbing away.

Soak With Suds

While you might think it’s best to wash your glassware and cake pans right away, soaking is the best thing you can do. By soaking your pots and pans, you’re letting the food particles loosen up naturally, making it easier to clean them efficiently.

Leaving caked-on pots and pans sitting out overnight without any soak or rinse is something we all do from time to time. Certain dishwashing hacks will help if you’ve got some heavy stains to deal with. One trick is to combine water and 1/4 cup of baking soda. Heat the mix to a boil. Remove the mixture from heat, and pour it into the dirty pot. Soak with the baking soda mixture for one hour, and voila — the food lifts right off.

If you have pans lined with old grease, try rubbing table salt onto them with a dry sponge. Salt is a naturally abrasive and absorbent material, making it the perfect antidote to grease and oil.

Use a Dish Tub or Blocked Sink

Using a dish tub will save you water, time and energy. Add your liquid dish soap directly into the container, and use a sponge to wash and scrub all your glasses, plates and silverware. Then, you can rinse off a few dishes at a time and place them aside to air dry.

If you don’t have a dish tub, you can use a sink stopper or a rubber or plastic mat to line the bottom of your sink and fill it with water and soap. Just make sure you have one side of your sink prepped for washing and the other side clear for rinsing with hot water.

Even with all of these dishwashing secrets and tips, your kitchen might still resemble a war zone after a full day of cooking. Request a free estimate from Thai Cleaning Services around the Baltimore area, and your kitchen will look spotless in no time.

House Cleaning Tips for Pet-Owners

In the United States, a lot of people have a lot of pets. Specifically, 43,346,000 households are caring for 69,926,000 dogs, and 36,117,000 households are taking care of 74,059,000 cats. That’s a lot of hair, dander, dirt and germs potentially scuttling around your homes. Sounds a little scary, but don’t worry.

It is possible and even somewhat easy to keep a clean house when you have pets. There are a lot of housecleaning tips for pet owners out there. We’ll guide you through some useful pointers, including preventative measures, items you’ll need for cleaning up pet messes and how to use them, and other useful tips for keeping all the dog and cat hair at bay for a clean house with pets.

Pet Cleaning Tips

Preventative Measures: Useful Tips to Lessen the Pain of Inevitable Pet Messes

Every pet owner has been there. You come home from work, and your angry cat has urinated in your shoe or your dear sweet lab has reupholstered your family room with his springtime shedding. Things like these are bound to happen at some point, but there are ways to head off the household pain of cleaning with a cat or cleaning with a dog and have a little more control. It takes a little bit of planning — and these preparation tips are helpful supplements to your usual list of tips for how to clean your home with pets:

  • Confine Your Pets to Specific Areas in Your Home: Using baby gates or just the simple act of closing doors will effectively restrict your pets’ access to certain rooms, and there will be less stress regarding cleaning a mess. It’s one of the best tips on how to keep a house clean with pets. If you only allow your dog or cat access to the carpet- and rug-free kitchen, family room and outdoor patio, you have control over where your they could potentially make a mess. Also, if they do make a mess, you can rest easier knowing that there will be no rug or carpet to scrub, just a hard surface floor to clean.
  • Use Only Indoor/Outdoor Rugs: There are dozens of stylish, beautiful rugs in this category. They come in a vast range of colors and designs so it will be fairly easy to find some that blend in with your home’s décor. Place a small indoor/outdoor rug before every door leading indoors from the outdoors. These rugs will grab most of the grime or water your pet may trek into the house. Additionally, place these rugs throughout your home, wherever your pet likes to hang out. These rugs are very easily cleaned with a damp cloth. They can even be hosed off outside if needed.
  • Bathe Pets Regularly: This tip mostly applies to your canine companions. Timely baths and grooming are essential preventative steps you can take in keeping your home clean, smelling fresh and, importantly, keeping your dog friends smelling great. Remember not to bathe them too often. A bath every three to four weeks is ideal to prevent their coats’ essential oils from being stripped away.

Timely Baths

  • Brush Your Pets Often: Regularly scheduled brushings are important. Brushing your pets’ fur lessens shedding and redistributes your pets’ essential oils in its skin. Brushing keeps the fur healthy, and it makes your pets look great!
  • Wipe Your Dog Down Once or Twice a Week: In between your pets’ baths, take a damp washcloth or wipes that are made for pets, and wipe Fido down. Doing this will get rid of dirt and dander, and will make them smell fresher. Look at it as a freshness recharge in between their baths. Your home will continue to smell fresh as well.
  • Vacuum Often: We know it’s no fun hauling out that vacuum — it’s heavy, cumbersome and noisy. If you make the effort to vacuum your floors and furniture at least once or twice a week, you will find less dog or cat hair floating around, or stuck to your clothing. If you buy one of those lightweight cordless vacuums, it will be even easier to vacuum more often, maybe even daily around the spots your pets like to frequent. The vacuum, and how often you use it, is one of the best tools to improve how you clean your home with pets.
  • Be Choosy About Fabrics: Choosing sofas, armchairs and loveseats that are upholstered with microfiber or leather make cleaning easy. These fabrics are wiped down easily. Cleaning off stains and pet hair is easy to do on these fabrics as well.
  • Launder Your Pets’ Bedding Frequently: Pet beds, or the bed covers, can get smelly. Their blankets can be odor magnets as well. A weekly wash helps your home smell fresher.
  • Keep the Grime Outdoors: Cleaning a home with pets can seem like an endless cycle thanks to the outdoors coming in with your dog’s feet. If you have a yard that can get muddy, keep a towel — preferably an old towel you won’t mind getting stained — by the door your dog uses to come in and go out. When the pup is getting ready to come in, wipe his feet beforehand. Easy to clean runners help keep your abode dirt-free as well.
  • Hire a Cleaning Service: Of course, it’s understandable that this isn’t really a doable option for everybody’s budget. However, if you can afford it every other month or so, bringing in a cleaning or housekeeping service for a “deep clean” can effectively help keep the dander, fur and grime in full check.
  • Paint Lower Cabinets With Dark Shades of Paint: Darker shades of paint will disguise the smears, stains and smudges your pets leave on your cabinets. Take prevention up to a higher notch by using paint that can be used both indoors and outdoors to make it even easier to clean.
  • Use Placemats Under Your Pets’ Food Bowls: This is just common sense. Instead of mopping up the floor, you can bring a messy placemat to the sink to clean very easily. Take it up a notch and look for placemats with a rim to contain spilled water.
  • Invest in Some Inexpensive Decorative Throw Blankets: Cover up your furniture, bed, or armchair with these budget-friendly throw blankets. You’ll be glad you did this when you see how much longer your furniture will last because of them. Using an acrylic/cotton blend, or even 100% cotton is best. These materials are machine washable and relatively easy to maintain. They also can take the effects of pet paws and hair.

Items That Will Help You Get Rid of Stains and Odors

Let’s start at the beginning. You’ll need tools. A variety of cleaning implements and everyday items are the first things to acquire if you’re going to be prepared to keep your home spotless. Cleaning a home with a cat is pretty close to cleaning a home with a dog.

cleaning implements

  • Lint Removers: Lint removers for your clothes are essential for every household that has dogs or cats. Refillable rollers that come with the sticky-sided paper are the kind you should pick up. They truly do great work in removing pet hair. There are reusable lint brushes available as well. These are also sold in pet stores or pet sections of your local supermarkets or drug and discount stores.
  • Enzymatic Cleansing Sprays or Pourable Solutions: When your pet makes a stain on your floor, there is a pretty good chance they will do the same thing again in the exact same spot unless you remove the stain and all traces of the stain completely. These stains have to be neutralized to prevent pets from re-staining these spots. Enzymatic cleaners are the best at removing pet urine. There are several brands on the market and are easy to find at your local pet store or from pet supply websites.
  • A Sturdy Cleaning Brush With Stiff Bristles: Some rugs can really hold on to pet hair. Sometimes, a vacuum won’t pick up all the hairs that become trapped and entangled in the fibers. Use a sturdy brush to scrub your carpet or rug quickly in a back and forth motion until all the hair and dirt come loose. Then the hair and dirt will be easily removed from the carpet’s fibers.
  • Old Towels and Rags or Paper Towels: These are useful for blotting fluids unceremoniously left by your pets.
  • A Standard Paint Scraper, Spatula, Disposable Paper Plate or Stiff Cardboard: This sounds like a redundant list, but these items are all similarly useful when you need to scrape and scoop up solid waste before the cleansing and disinfecting process starts. You don’t need every single one of these items, but it is very useful to keep one or more of these items handy in case you need to clean up a poopy mess.
  • A Stain Remover Made for Pet Messes: You’ll need a good stain remover. A stain remover makes cleaning with a pet a lot easier than with plain water. Stain removers come in different forms, but a spray or liquid is best for precise placement on the stain or stains. Make sure you get one that’s non-toxic.
  • A Wet and Dry Vacuum: If you can make an investment in a wet/dry vacuum, you’ll have a gadget that can vacuum up wet messes easily. This vacuum can also be used on pets who are willing to sit still and be vacuumed of loose hair.
  • UV Fluorescent Tube: Adding an ultraviolet (UV) light to your cleaning box is a bit high-tech, but worth it if you can get one. The portable ones are powered by batteries, and can easily travel with you all over the house and beyond. These lights will help you find dried, forgotten urine stains, which will make it easy for you to eliminate the stains once and for all.
  • White Vinegar: Most households have this in their kitchen already. Mix up a natural cleaner by combining a half cup of vinegar with a quart of water in a spray bottle. This handy cleaner will help remove new and recent pet stains.
  • Incense: Burning a little incense to remove your pets’ odors post-litter box use is a great idea if you don’t want to wait for the odor to dissipate on its own. Use it on a rainy day, when your dog is bound to be damp from going in and out of your house several times a day. It produces quick results. It’s an effective way to keep your house from smelling like a wet dog.

incense

  • Lemons or Any Other Citrus Fruit: Citrus fruit is another superb natural tool for getting rid of pet odors. Cut up a couple of lemons or limes, put the cut pieces in a bowl, and place these bowls anywhere near the litter box or your dog’s bed area.
  • Latex Gloves: Put on some latex gloves and use them like a lint roller. If you run your hands over any pet hair-covered surface, the fur and hair will stick to the latex. This method can be used on your furniture, bed covers and your car’s upholstery. When you need to get rid of the hair, run your gloved hands under running water, and this will clean off your gloves.
  • Shaving Cream: Foamy shaving cream —not the gel — can be used in place of a standard pet stain cleaner. Clean up any debris or solids then spray the shaving cream on the stain and allow it to sit for a couple of minutes. Then wipe the foam away with warm water.

How to Remove Pet Hair From Everything You Own

It feels like an endless fight, doesn’t it? As a pet owner, you’re constantly finding dog or cat hairs everywhere. It seems almost impossible to keep the scourge of pet hair under tight control. The best defense against accumulating pet hair is to have an effective offensive game plan.

It sounds corny but it’s true. Not only do you have to stay on top of removing dog or cat hair as you encounter it, but it’s more effective to be ahead of the hair that’s building up in your home. The following are ways to effectively get rid of pet hair:

  • Hair on Your Floors: Stop vacuuming your wood or tile flooring. When you use a vacuum on these floors, most of the pet hair is just flying all over the place, not being sucked up into the vacuum. Instead, buy a duster mop, preferably one that’s electrostatic. These trap hair really well. Vacuum afterward, to get the dirt that’s still there. If dust bunnies are a constant issue, dust-mop your floor two to three times weekly. Aim for daily.

don't vacuum wood floors

  • Hair on and in Your Rugs and Carpets: If your rugs or carpets are starting to look dull, and the color looks off, it could be your pets’ hair getting stuck or woven into the carpet’s piling. Vacuuming doesn’t always work well. Remember that stiff-bristled brush we talked about earlier? Grab that brush, and scrub your rug. Don’t use soap or water — just the dry brush scrubbing the rug or carpet will loosen hairs. Once you loosen those hairs, you can collect them with a dustpan or break out the vacuum again. Doing this weekly can keep your carpets and rugs looking fabulous.
  • Hair on Your Furniture: Use a dry squeegee or a latex glove to easily remove pet hair from your furniture. If neither these nor a vacuum work, get that lint roller out. Another way to remove hair from furniture — take a paint roller and cover it in duct tape, sticky side out. Roll the paint roller over your furniture. You’ve just fashioned yourself a nifty, larger lint roller.
  • Hair on Your Clothing: Usually, a lint roller works well on your clothing. The problem is that sometimes we might not have a lint roller handy when we most need one. When this occurs, find some masking or duct tape. Wrap a 4 to 6 inch piece of tape, sticky side out, around a few of your fingers. Pat the hair off your clothes with this makeshift lint “roller.”

Maintaining a Clean Home With Pets

We truly love our pets. They are an important part of our household. Many pet owners even treat their dogs and cats as furry children. Even so, there is a good chance your fur baby is trekking dirt, grime and germs into your home. We’ve provided some useful cleaning tips, but you may have some more concerns that were not addressed here.

For more information about cleaning your home from top to bottom, Thai Cleaning Service can help. Thai Cleaning Service is a trusted cleaning company in the Baltimore area. We have maintained a 97 percent customer retention rate during our eight years in business. Feel free to contact us to let us know how we can help you reach your home cleanliness goals. For a free estimate, please fill out the form on our website. We look forward to hearing from you.